Oops, it’s a beret

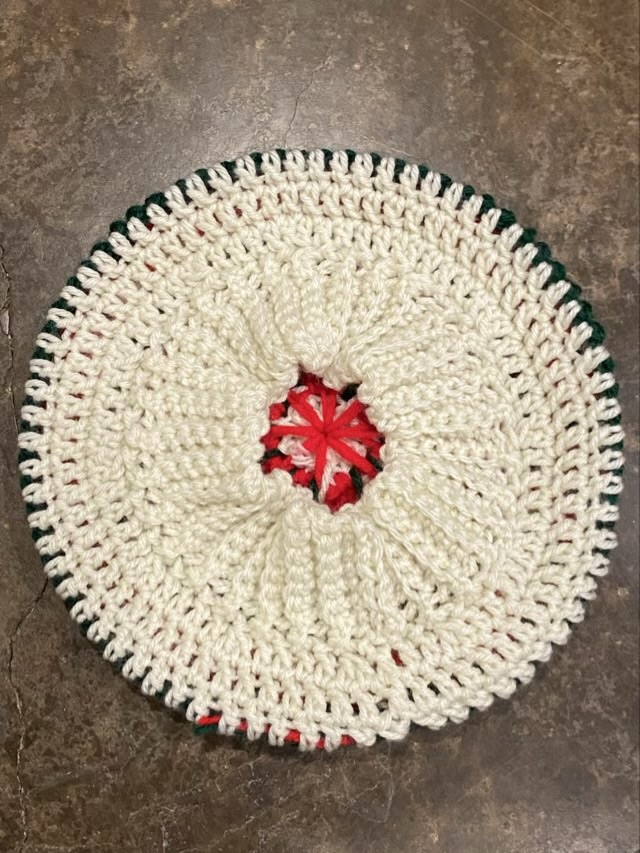
I’ve drifted off firmly into the realm of experimentation in this round of crocheted hats. Because I had red, green, and white in the stash of acrylic yarn, I wanted to experiment combining the colors with a spike stitch. A spike stitch drops one loop of yarn down a row, making a long V shaped yarn embellishment. I stuck with my standard double crochet hat pattern, making spike stitches every three double crochets and switching colors every row. I did not think that one loop of yarn would change the width of the row, but it did. Instead of getting a nicely rounded beanie, I had a flat circle. Hm.

Photo description: flat crocheted circle with rounds of alternating red, green, and white acrylic yarn, the spike stitches mixing the colors like a star burst

Time to make it a beret instead. I switched to using just the white yarn with no spike stitches, and the fabric immediately made the turn without decreases. I didn’t have to make decreases until round three. Then I switched to a single crochet parallel rib for the last band. The ribbing is very stretchy and although it looks in the picture like a small opening, it expands to fit a head, and lays flat for storage (happy accident).

Photo description: under side of the beret all in white with three rows of double crochet and a band of single crochet rib

Macrame: Cedar branch

I realized that I had a free substitute for the thin dowel I tried to use for a large macrame hanging: a branch from the yard. Not only do we have copious available branches, naturally shaped wood looks really nice with macrame. I even had a nice long cedar branch that I had cut a few months ago that didn’t work for the project at the time, that had been sitting out and curing. I stripped off the bark, which is much easier after the rain when the bark is wet, then let the wood dry. I used an oscillating spindle sander to get the remaining traces of bark removed, then sealed it with several applications of Howard’s Feed-n-Wax.

Photo description: curved smooth cedar branch set above the thin dowel with cotton cord tied on with larks head knots

Transferring the cotton cord from the dowel to the branch wasn’t difficult once I used some spare cord to tie it up above the dowel. Larks head knots are very stable, but very easy to remove.

Photo description: all the cotton cords transferred to the branch which is naturally curved not bent due to the attached weight

I left the old thin dowel hanging as a pattern line, and added a couple more guide lines to the wall using washi tape.

Now I have to settle on my macrame pattern. I initially intended a simple all-over grid, but my ideas keep getting fancier and I’m thinking of pockets and loops. Hm.

Cotton is heavy

I have it in my mind to make a practical macrame hanging to store small musical instruments. I had the macrame cord and a quarter inch dowel already, so my start cost was zero. The twisted rope I knotted for the hanger went well, and I hung the dowel up in a small hallway on a utility rack. I then started adding long strands of cotton cord.

Photo description: wood dowel with many doubled strands of cotton cord tied on hanging on the wall from a wire rack, dowel arcs down from the weight of the cotton

As I neared the number of strands of cotton I wanted, I noticed that the dowel had a visible bend. Uh oh. The slim dowel could barely hold the weight of the cotton, and certainly wouldn’t take more weight. I have to get a bigger dowel. Hm.

Photo description: same pre-macrame set up, but with all the hanging cords tied in a large loose knot to reduce the cat risk

To keep the long dangling cords from becoming cat toys, I tied them up while I process my intentions.

Macrame helper

Photo description: gray tabby with arms in ready-to-get-the-string position on a leather lounge chair that has a twisted macrame rope in progress draped over the back, with my nest of crafts and books on the floor next to the chair

My love triangle: I love yarn projects, and I love cats, and cats love yarn. Sigh.

Throwback Thursday: wire frame

I was tasked with making a trophy for a duct tape contest back in December of 2009. I found a block of wood from my stash, imbedded several hanger wires, then shaped them into a chalice.

Photo description: wire armature chalice set into a finished block of wood with routed edges

I covered the whole thing in strips of standard duct tape, then forgot to take a final picture. Hm. When it was presented, though, it was deemed way fancier than the requester envisioned. That’s what happens when a crafter gets their hands on duct tape.