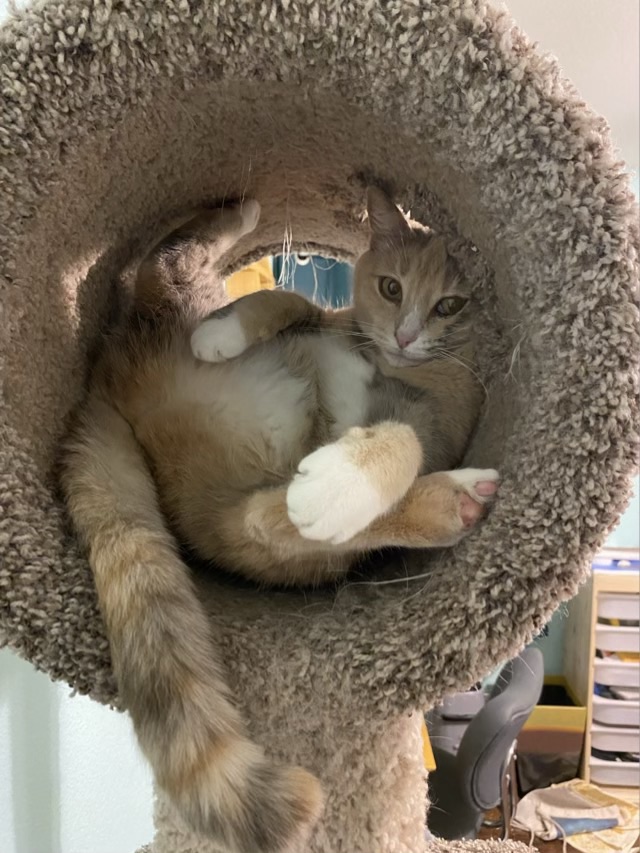
Sophie the cat loves to climb her carpeted cat tree and play “get your fingers” through the holes. She is willing to contort for the side attack. Silly cat.

Sophie the cat loves to climb her carpeted cat tree and play “get your fingers” through the holes. She is willing to contort for the side attack. Silly cat.
I purchased a bag of quilt scraps from my local quilt store. I love the owner’s eye for color, and it gives me something to exercise the Singer model 66 treadle sewing machine. I know that the scraps I sew together will eventually be used to make something purposeful, and this time I didn’t have to wait long.
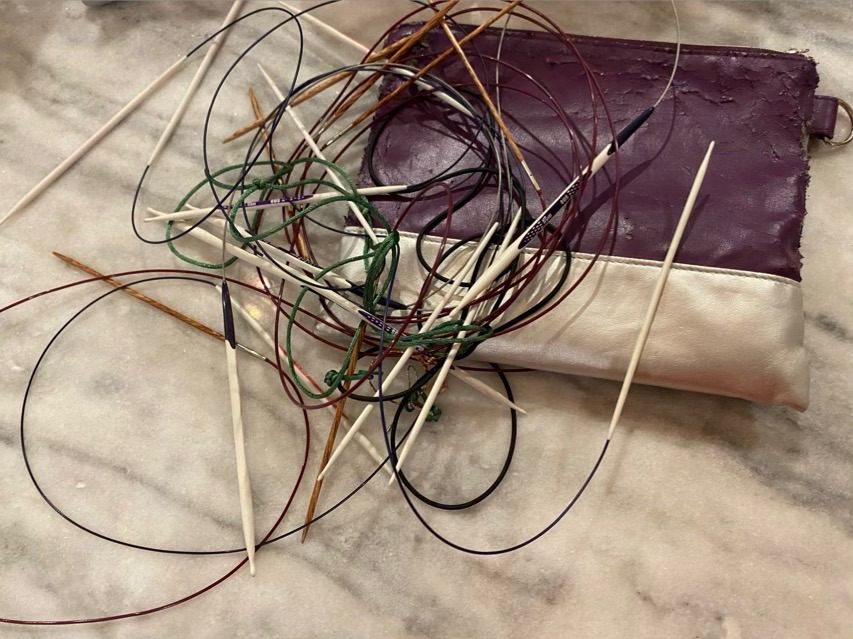
The free bag I was using to hold my circular knitting needles disintegrated, literally. The outer coating was peeling off. Storing circular needles in a pouch is also problematic as they tend to tangle and be a right mess.
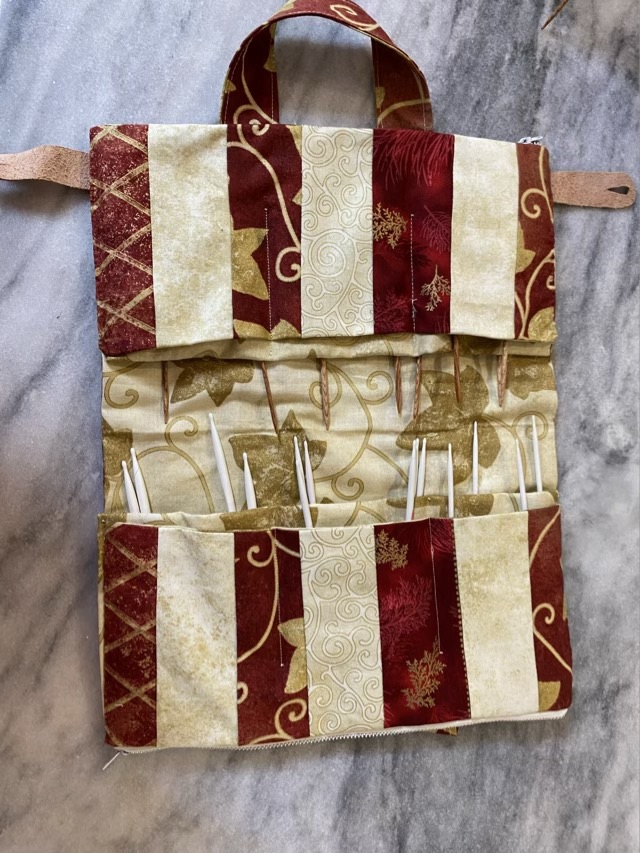
I decided that the long strips of fabric that I have been sewing together would do well for the base of a knitting needle case. I paired it with coordinating fabric from my stash (yes, I had matching fabric for the quilt scraps), and layout a folded design that will create 12 inner pockets and two outer pockets.

I sewed the two base pieces of fabric together using the treadle sewing machine, leaving a small gap, then turned the case right-side out. I pressed the whole piece, then laid out the side pocket folds. I sewed zippers across the edges of the outer pockets using oversized vintage zippers.


To make the inner pockets, I measured out three sections on each side and sewed from the top of the inner pocket down to a couple inches shy of the zipper. This is so when accessing the pockets from the zippered side, the bottom is closed, but the pockets aren’t too deep to reach the bottom. This took some experimentation. And seam ripping.
I hand-sewed the sides of the pockets together because there were 16 layers of fabric at the edge. None of my machines can handle that fabric load. A simple straight stitch with teeny tiny outside stitches did very well to pull the fabric together neatly.
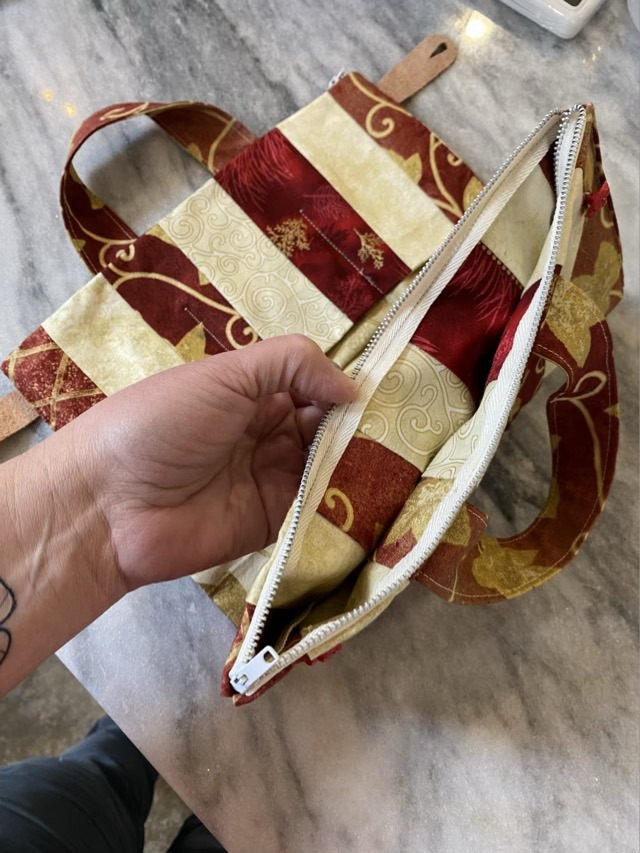
I used the treadle machine to sew two long strips of fabric together, turned it right-side out, stitched along the edges, then sewed it into a circle to make the handles. I machine sewed the handle to the bottom of the bag, then hand sewed the handle to the top of the bag. To keep the bag closed, I cut some thin pieces of finished leather, cut in button holes, and sewed them to the sides of the bag. I found vintage red buttons in my button stash and hand sewed them on.
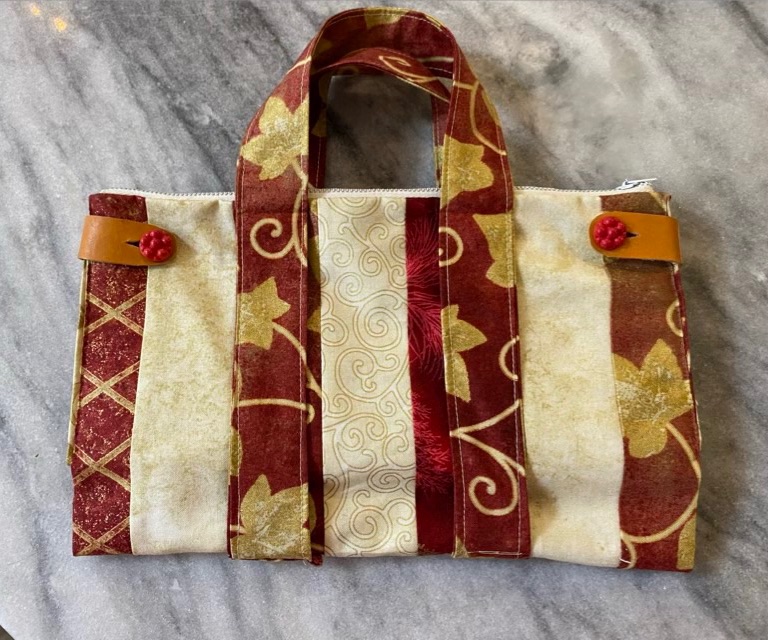
All done! All the sewing was done either by hand or with the 1916 treadle sewing machine. The zippers and buttons are vintage, and the whole project cost me only time, since the fabric was sourced from my stash. Now my circular knitting needles are neatly stored and organized, with space for stitch markers, rulers, and other knitting necessities in the zippered pockets.
Put a fuzzy bed in the sunlight and it will sprout a cat. Even if it is an unconventional bed.
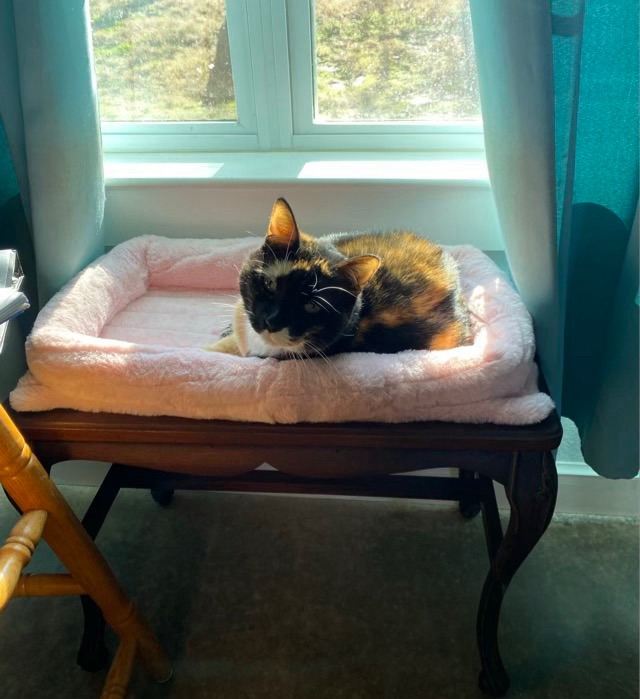
I was a little concerned yesterday when the cats would have nothing to do with the new bed. I’m glad baiting the bed with sunlight worked.
Ok, so this is probably the silliest I’ve ever made, and that’s saying something. I repaired the broken leg in an old side table that had been used as a bench (yesterday’s post), and rather than tempt fate by putting a solid top back on, I made it into a cat hammock.

I had a pink fuzzy blanket that had already been cut into for another project (we couldn’t find the fabric by the yard, so bought a blanket), and sewed a two sided mat. I stapled the mat down to the table top, over the central opening. I then sewed a long tube of the fabric, stuffed it with polyfil and sewed that down on the mat. It is quite the sight. The cats are not too sure of it, so I put it beneath the front window where it will get some sunlight. I’ve sequentially put all three cats on the bed; all have rejected it. I’ll give it some time.


One of my neighbors put out an upholstered stool on the side of the road. It had elegant curved legs, but one of them was broken. I picked it up and glued the leg back on.

There was still a large gap in the leg after I fit it together.
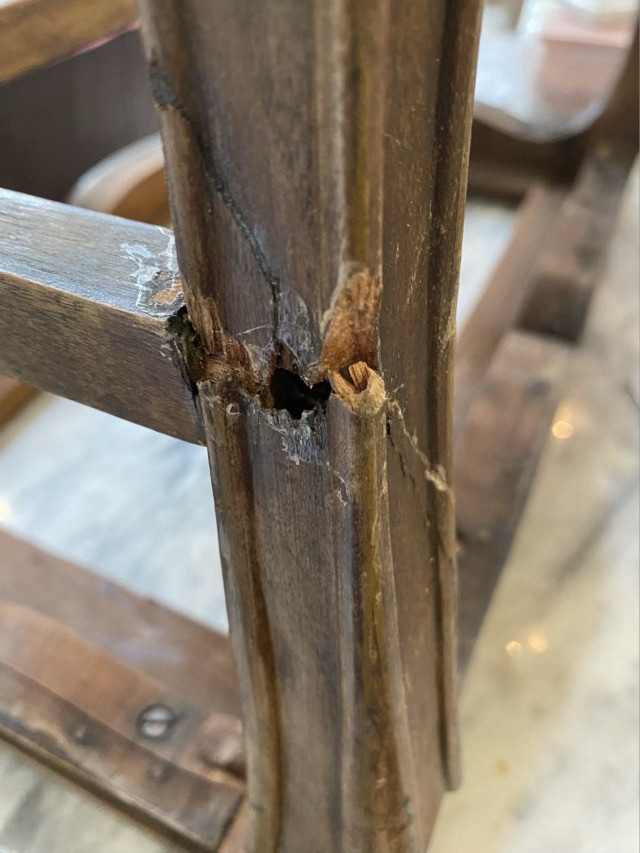
I bought some Apoxy sculpt modeling compound, which is a two-part epoxy clay that hardens without baking. I bought the color called “bronze” because I was inspired by the Japanese method of Kintsugi, or making a visible gold repair. The “bronze” was not metallic at all and actually was a fair match to the stained wood. Huh.
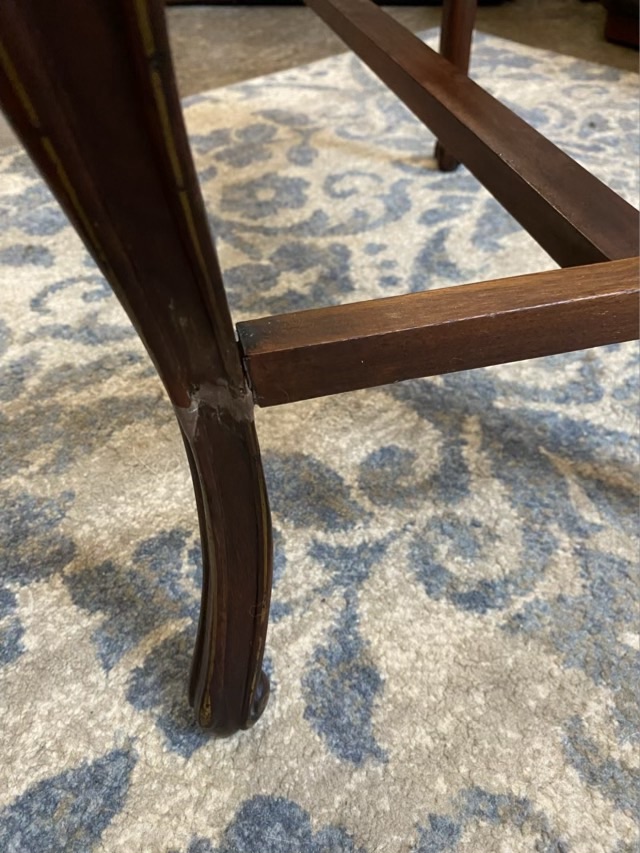
I removed the water stained upholstered top and found something interesting.
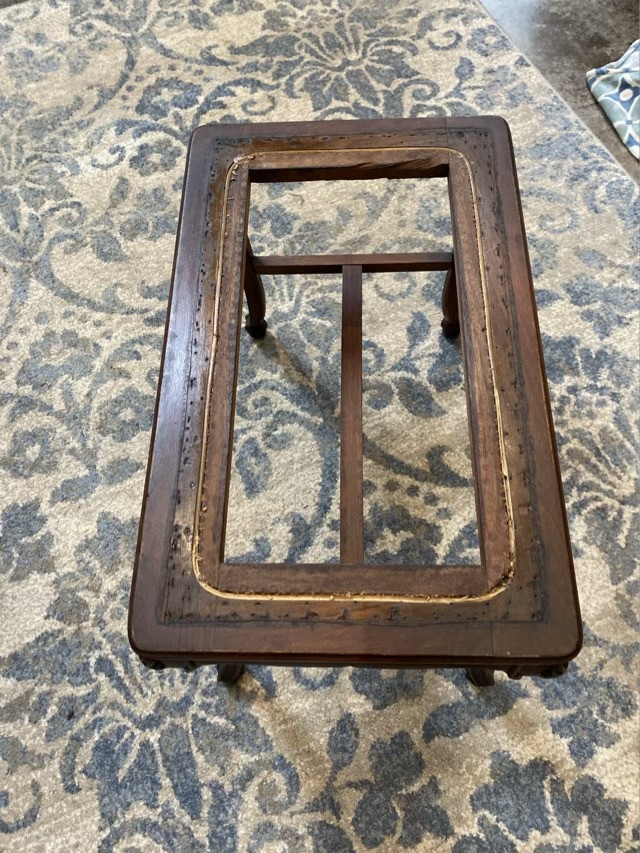
This little piece of furniture has been many things. At one point it had a rattan top that had been cut out. I’m guessing the rattan was original and this was intended to be a side table. Then there is a round of staple or tack marks around the old rattan groove, which I assume was the second and maybe even third life of the piece. When I picked it up, it had green velvet fabric stapled to a plywood board, that was then screwed in place from underneath.
I have no doubt that those legs would break again if someone sat on it. So what to do with elegant legs that can’t take much weight? Oh, I came up with something, and it is probably the silliest thing I’ve ever made. I’ll share the results tomorrow.
