
Today you get a picture of a time cat, because Izzy was perfectly lined up with the grandfather clock in the background and it made me snicker. Izzy was not amused at my antics.

Today you get a picture of a time cat, because Izzy was perfectly lined up with the grandfather clock in the background and it made me snicker. Izzy was not amused at my antics.
Every year I make bookmarks for my youngest’s teachers. The teachers love them, and my youngest gets enthused about ideas. This time she wanted herself flying through the sky, so we took her picture laying on a bench, and I Photoshopped her onto a sky with fluffy clouds (since she chose to wear her fluffy cloud sky shirt). But what to do for the tassel? I went digging through my stash, looking for white felt, but instead found some poly batting. I could work with that. To make the clouds, I cut out a oblong of batting, then melted the edges with a candle flame to reinforce the edges and make it more cloud-like.


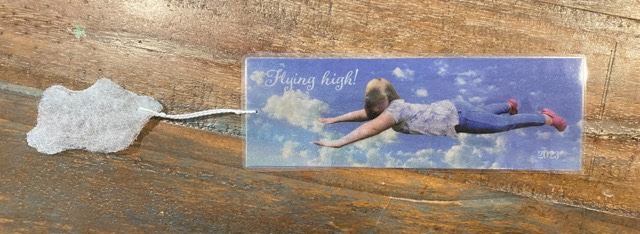
I attached the “clouds” to the bookmarks with a length of pearlized cotton. For this blog, for safety sake, I blurred out her name and face. The bookmarks that went to the teachers were not blurred!
Summer do time for the dogs! I usually just shave their backs for temperature sake, but Griffin’s hair was starting to form dreds, and Missy’s was getting long and scraggly, so this time I shaved them down to the toes. (I did leave their tail hair, because it was the only place that was matt free.)
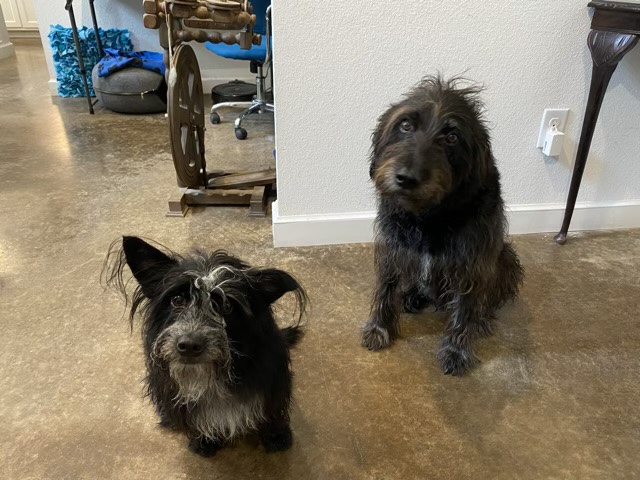
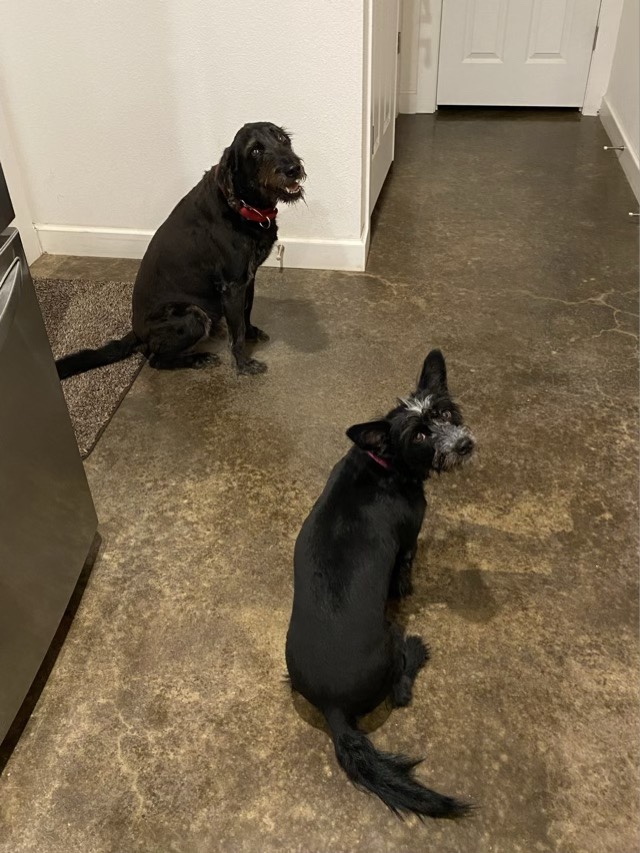
I trimmed close around their faces too, just not as close as their bodies. This helped even out Griffin’s eyebrows, as he had to have a stye removed recently and the vet shaved his eyebrow for the surgery. I’m definitely not a professional groomer, but they are much happier without their winter coats as summer temps are setting in. I do recommend getting a good quality trimmer if you’re going to do your own grooming, definitely worth the investment.
The home mushroom kit that I purchased six months ago has fully colonized! The instructions say to keep the plastic wrap on until it turns completely white (which means the mycelium has completely covered the substrate).
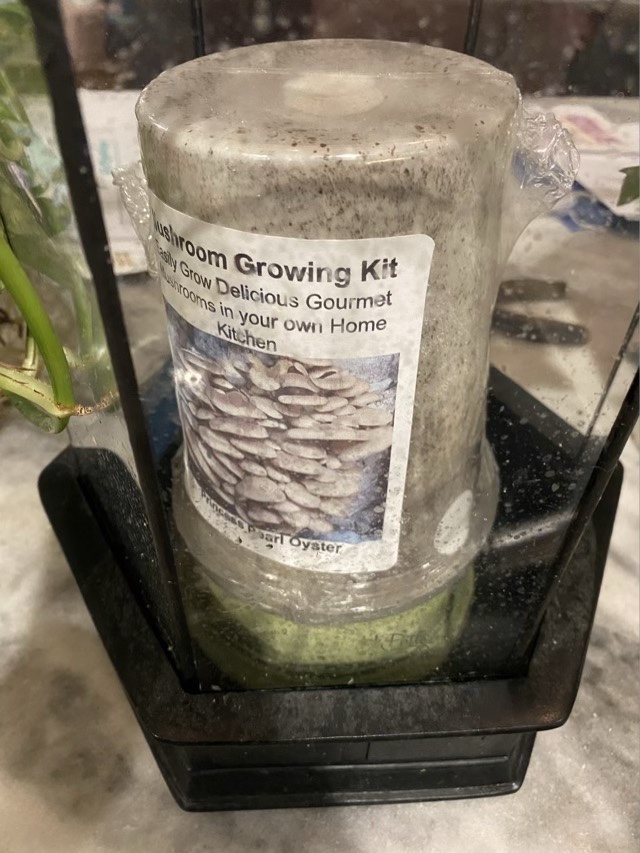
The plastic wrap is now off! I’m keeping the moisture around the fungus high by having water in the bottom of a terrarium. The kit is on an upturned bowl to keep it out of the water.
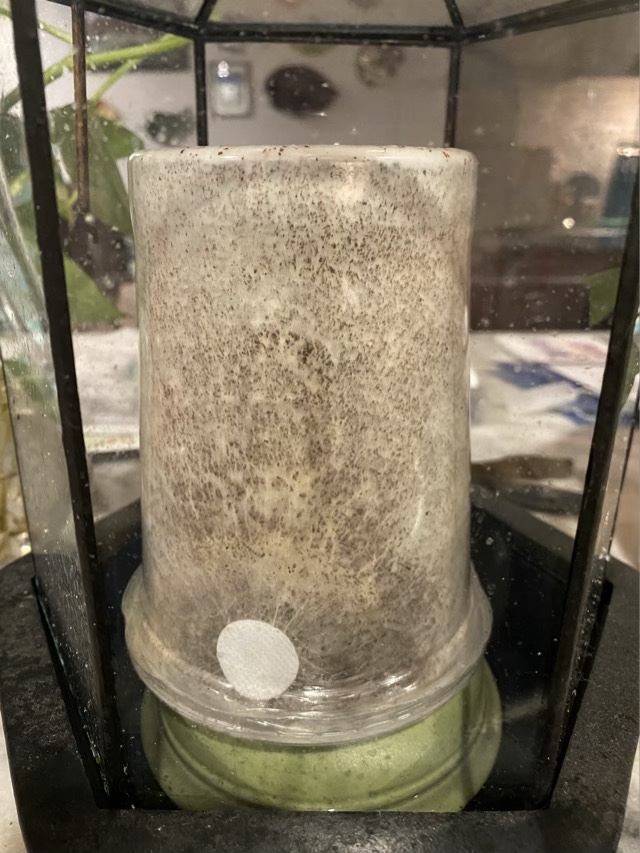
I’m hoping to see the fruiting bodies emerge soon, but really I have no idea how long it takes. I’ll keep you updated.
I found another thing to do with my woven bands: bracelets! I chose to sew leather ends on to reduce bulk, and I had the materials.
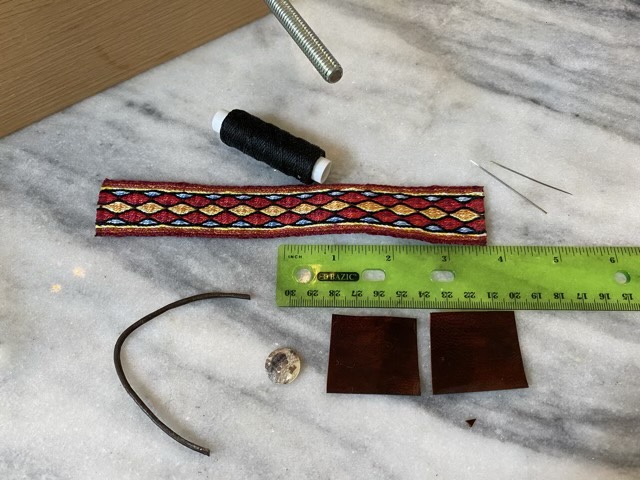
I cut a strip of goat leather and stained it dark brown, then sealed it with an acrylic clear coat. I cut two smaller rectangles from the finished leather, cut a length of leather cord, sealed the ends of the woven strip with clear glue, selected a shell button, and sewed using waxed nylon cord.
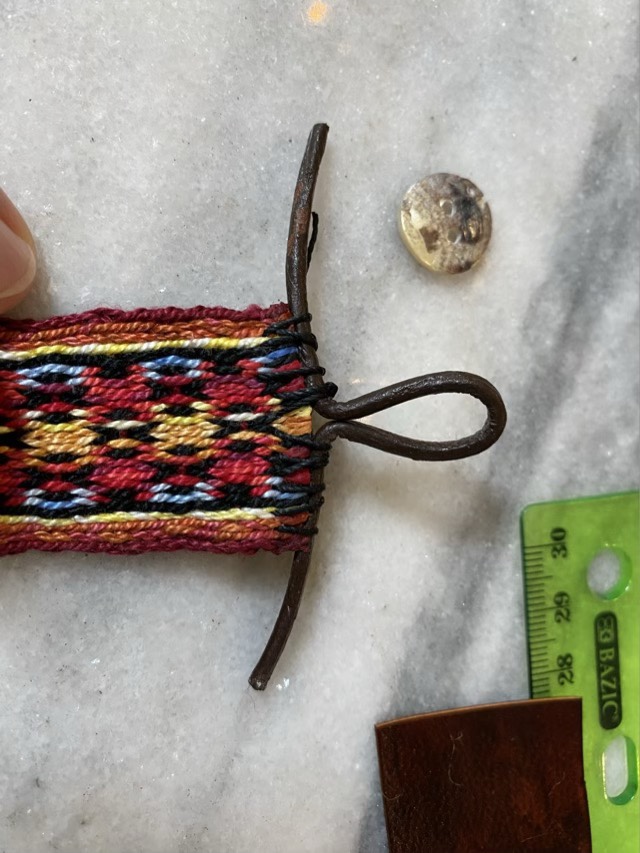
To form the eyelet for the button hole, I folded the leather cord in half, then bent the ends outward at a 90 degree angle. I secured it to the end of the woven band with waxed cord, then cut off the excess. To cover the end, I cut a slit in one leather rectangle to slide over the eyelet, then sewed the leather to the band. The nylon thread was thicker than I wanted visible, so I separated the three strands and just sewed with one.

My wooden book clamp serves well as a leather stitching aid. I used wax paper to keep the newly finished leather from sticking to the wood. (I recommend waiting 24 hours before sewing, but I was impatient.)

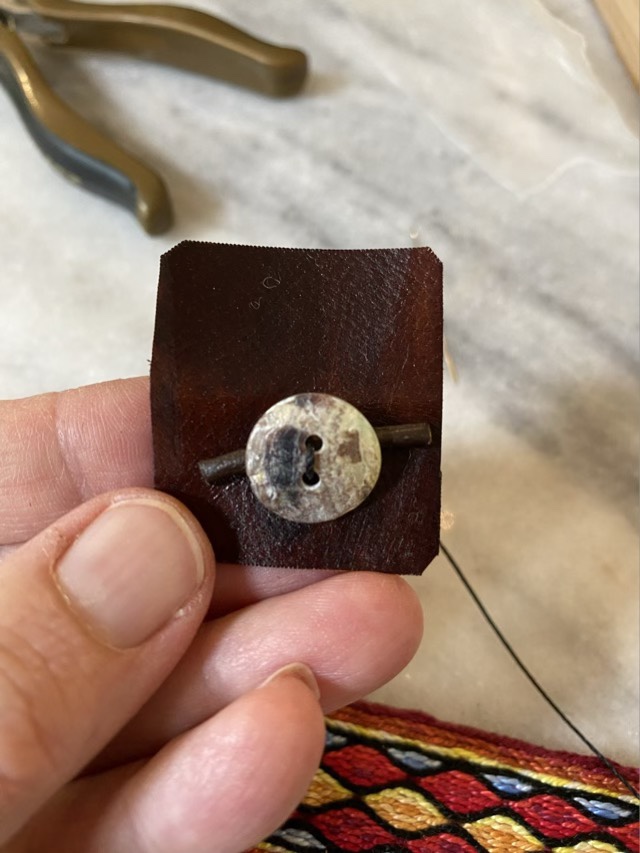
For the button end, I sewed the button offset on the other leather rectangle, using cord scraps to space the button off the leather. If the button is sewn tight to the surface, there isn’t enough room for the eyelet.

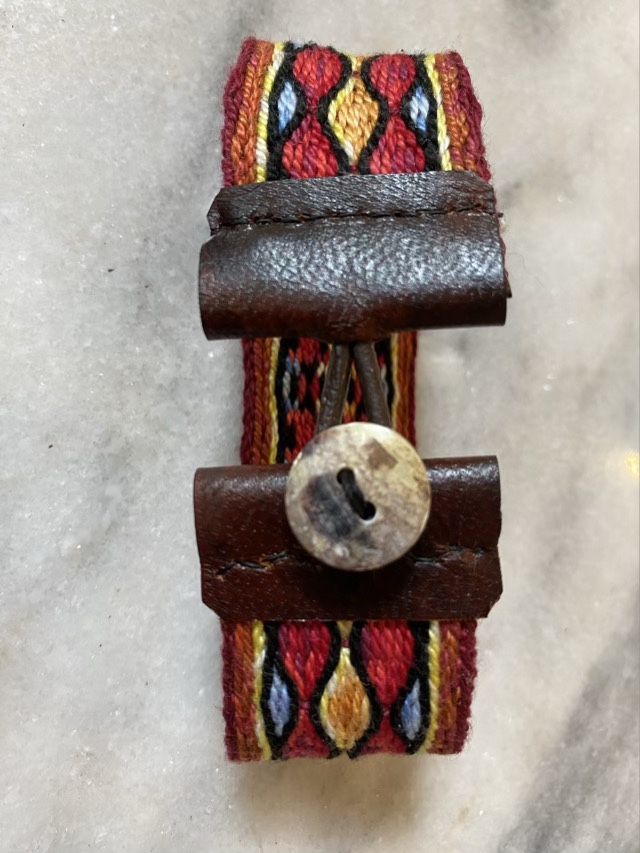
I’m pleased with the finished bracelet. Although I would have preferred the leather ends to butt together, the gap actually makes the bracelet more comfortable to wear by giving more flex. The bracelet is easy to button one handed, and is light.
