Doll jacket

I used the gimp yarn I spun to make some more doll clothes, because there wasn’t near enough to do much else. I wanted to see if I understood the construction of a nålbound sweater, but it is very difficult to get a sweater on a doll, so I also tested cutting the fabric and finishing it.

Nålbound doll sweater made from the bottom up

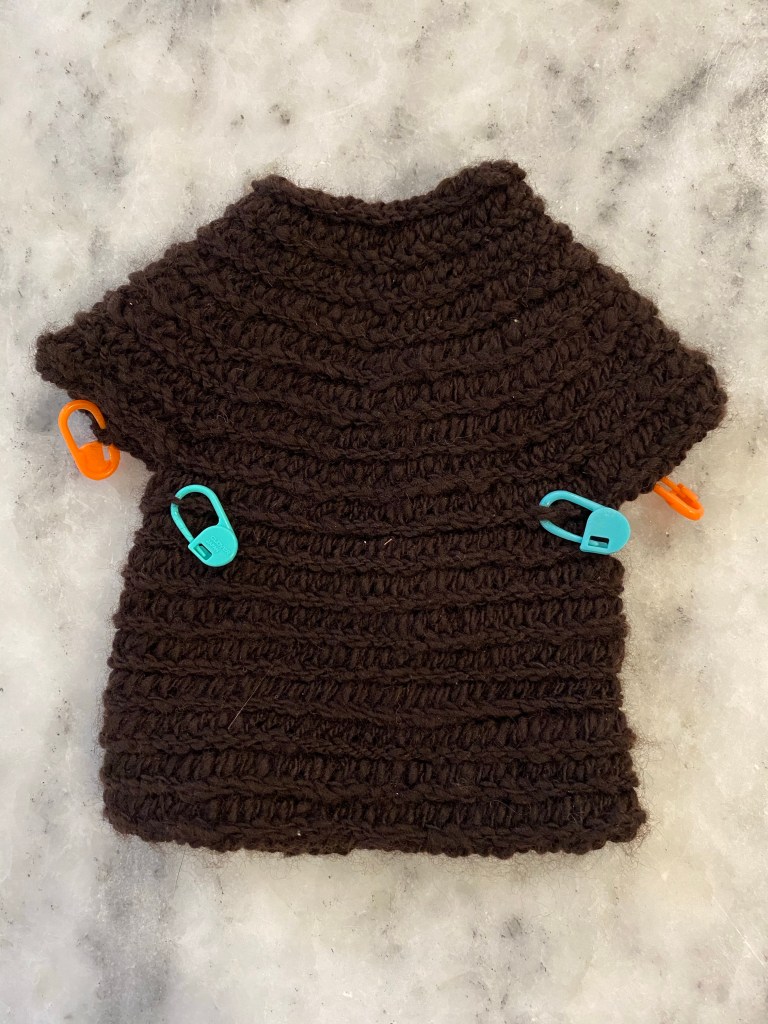
I used an existing shirt as a guide for the dimensions, and started from the bottom. When I reached the armpit area, I made a loop on each side, then calculated my decreases. I added 50 stitches with the arm holes and needed to reduce an additional 20, all over 7 rows, so each row needed 10 decreases. I placed markers and did decreases at and between the markers (so I didn’t have to count stitches!) I then cut the garment up the front and removed the partial strands, then pulled the attached threads snug. Using a tapestry needle I ran the ends back through the fabric on the inside.

Running the cut ends back through the fabric

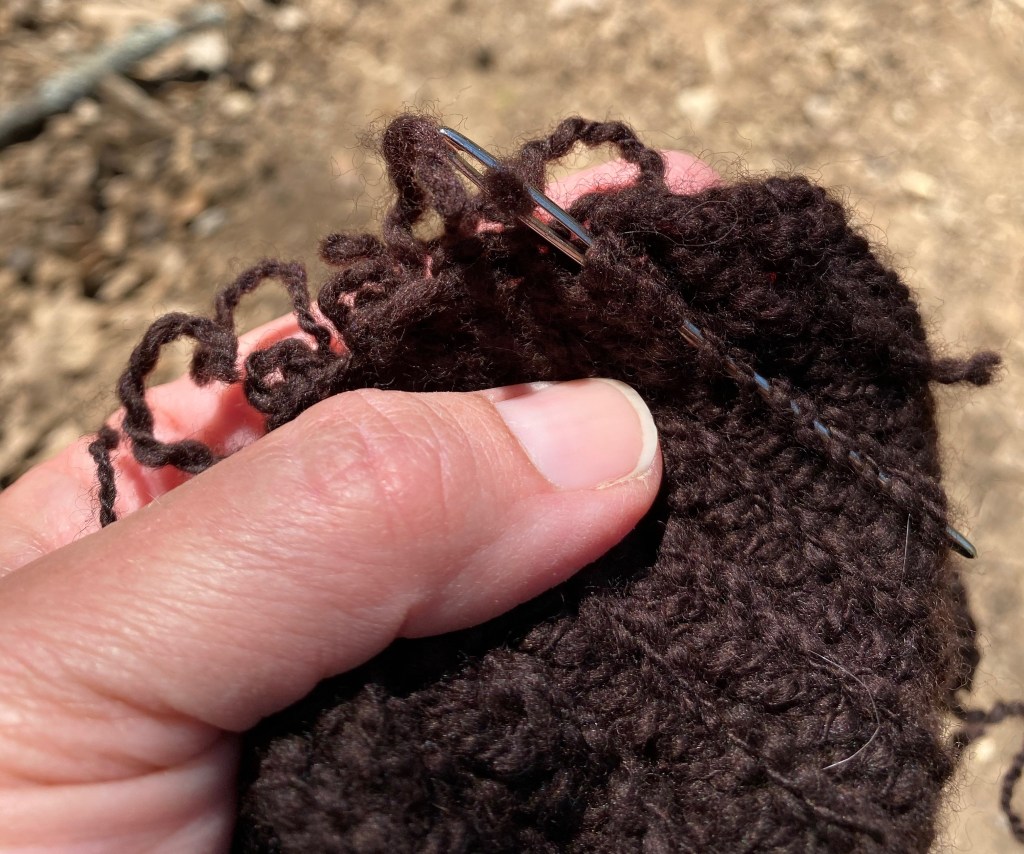
I was going to add an edging, but I quite liked how the edge came out just by neatening the cut yarn. Nålbinding is amazing! I then added sleeves to the arm holes. I had a little extra yarn, so I made a matching ear warmer as well.

Finished doll jacket and ear warmer, 2-ply gimp Merino wool hand spun, Finnish 1+2 F1 stitch

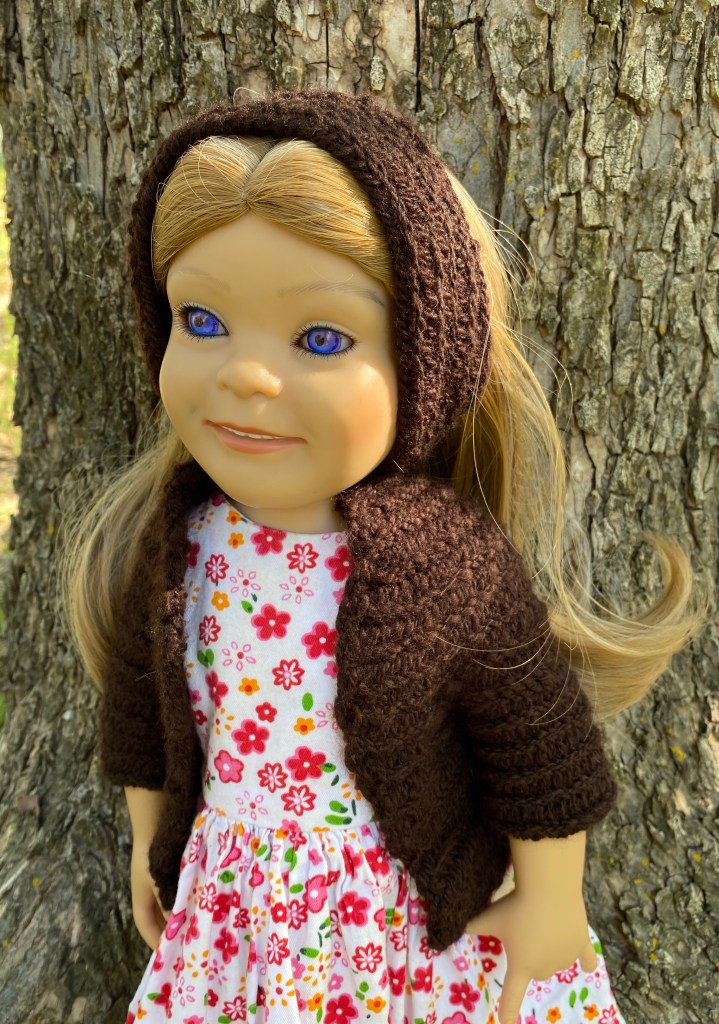
This doll is also sporting a new wig. Her old wig’s glue deteriorated and it fell off, so we ordered a new one that matched my daughter’s current hairstyle and superglued it in place. I’m not ready for doll hospital work, but was glad I could do a slight repair. Her original eye color faded due to moisture attack, however I am not up for changing eyes. That is intense. I used sharpies and some isopropyl alcohol to repaint the eyes so she didn’t look like she had heavy cataracts.

Surprise Iris

Very short purple Iris

Well that is surprising. I planted white Iris three years ago, and last year all the blooms were white. This year a purple one has bloomed in the patch! The other plants don’t even have buds yet.

Buffalo down

Buffalo down sounds like it comes from buffalo wings, but it is not feathers but the fine hair from the North American Bison. I love the opportunity to work with local fibers (and support local) and was so excited to find a nearby supplier of buffalo down. I grew up eating buffalo; it is a great low fat protein. To be able to use more of the animal is fantastic. The Buffalo Wool Company (thebuffalowoolco.com) uses fiber sheared from the hides of bison being processed for meat. Usually this fiber would be burned off, but they collect it and make hats, gloves, socks, and spinning fiber!

My buffalo down came in a beautiful golden bag

The owner was kind enough to share spinning tips as well. He said to spin “fast and fine” and to hold a small amount in my palm and spin off the pinch. I decided to use the tahkli spindle I made from an old button since it spins very fast and works well for cotton which is also a short fiber. I’m sticking with my spoon as a spindle rest because the handle is convenient.

Spinning buffalo fiber with a homemade tahkli spindle
Holding a small amount of fiber in my palm and spinning from the pinch (photo credit to my eldest)

It took me a bit to understand spinning from the pinch, but once I did, spinning went much smoother. The yarn is fine but fluffy! I spun until the cop wouldn’t stay put on the shaft, then wound it onto a small wool bead that my mom made. This is much easier than starting the ball with yarn! Some of the single is very thin, I was surprised when I didn’t break any of it winding it into a ball. I weighed everything and figured that I spun 6 grams of fiber. I pulled another 6 grams out of the bag to spin another single, then I will ply! I am really enjoying the spinning! The fiber is well prepared — I had no waste! (Yup, three exclamation point punctuated sentences in a row. I’m that excited.)

Winding the buffalo fiber yarn off onto a ball

Back with the flock

Magic had been up and putting weight on her leg, so we decided to let her down with the flock for a bit to get some time out of isolation. She immediately had a dust bath in every usual spot. Such a dusty hen! We observed her for while, but when it was obvious that she could get around well, and wasn’t being picked on (quite the opposite actually), we left her out for awhile. When I went to put the hens up for the night, I really expected her to be on the ground somewhere, but she was up on the roost with her girls! So she stayed out of birdie jail. She is still limping, and I wonder if it will be a permanent limp, but there is no reason to keep her cooped up (haha) if she can get around just fine and isn’t showing signs of disease, especially with our temperatures starting to soar.

Magic the hen back in the middle of her flock (green arrow)

Shasta Daisy

Shasta Daisy

When planning our front flower beds, we give our kids the option of choosing a plant. My youngest chooses daisies every time. This year the Shasta Daisy caught her eye. They certainly are pretty!