Spoiled pup

My puppy is getting old. He will be 7 this summer and it will be time to switch to senior food. Wha? I thought his middle aged bones might need a cushy bed. All previous cushy beds died a torn death, so he sleeps on a pile of blankets with no hems (he has a thing against hems and nibbles them off). He will still have blankets in his kennel, but when laying out in the living room with the family, I thought he needed something better than the concrete floor. We have tried the “chew proof” dog beds, but the thick canvas like material made too much noise for him (yes, I have prissy dog). I also didn’t want to spend much in case he rejected it. What I found on sale had a white fluffy top. All the fluffy soft quiet tops of reasonable price were white. I have a black dog. It only took a week to see the dog hair.

Black dog and white beds don’t mix well

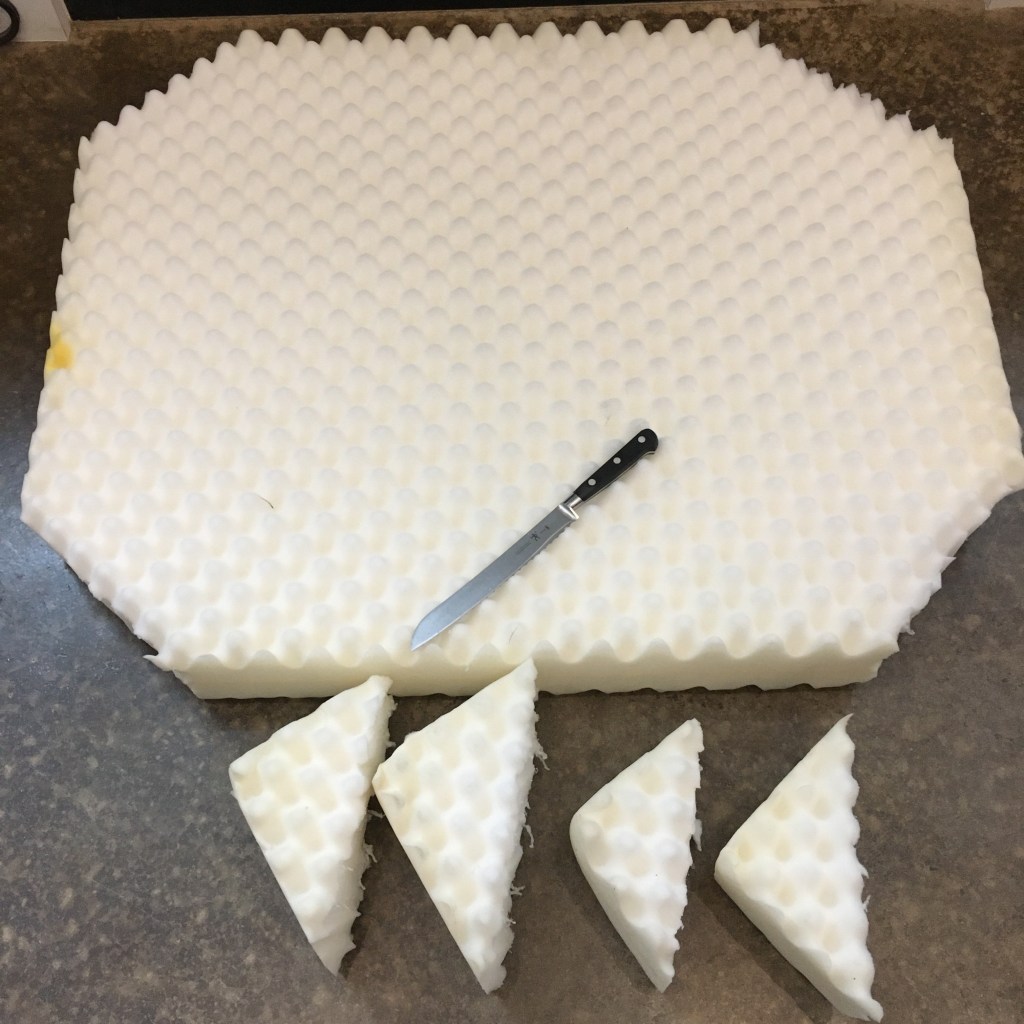
The good news is he likes it. So since he likes it, what do I do about that no longer white top? Recover it, of course. I found some beautiful fake fur fabric at the hobby store, and purchased some less expensive fleece for the bottom. Sewing square corners is not my favorite activity, so I trimmed the corners of the cushion (which is just two layers of egg crate foam glued together). Scissors couldn’t handle the thick foam, but a serrated knife slid through easily.

Trimmed corners on dog bed foam

I also literally ripped out the zipper from the old cover and reused it for the new cover because I couldn’t find a zipper longer than 36” at the store. I did pick the stitches on the end of the zipper, but then it ripped out quite nicely (and much faster than using the seam ripper the whole length, ugh). I cut an oval out of the fake fur, and a matching oval out of the fleece, then cut strips for the sides. Sewing fake fur is a tricky business as the thick fur slides and doesn’t like to line up, but I finished sewing it and put it in the foam.

Recovered dog bed

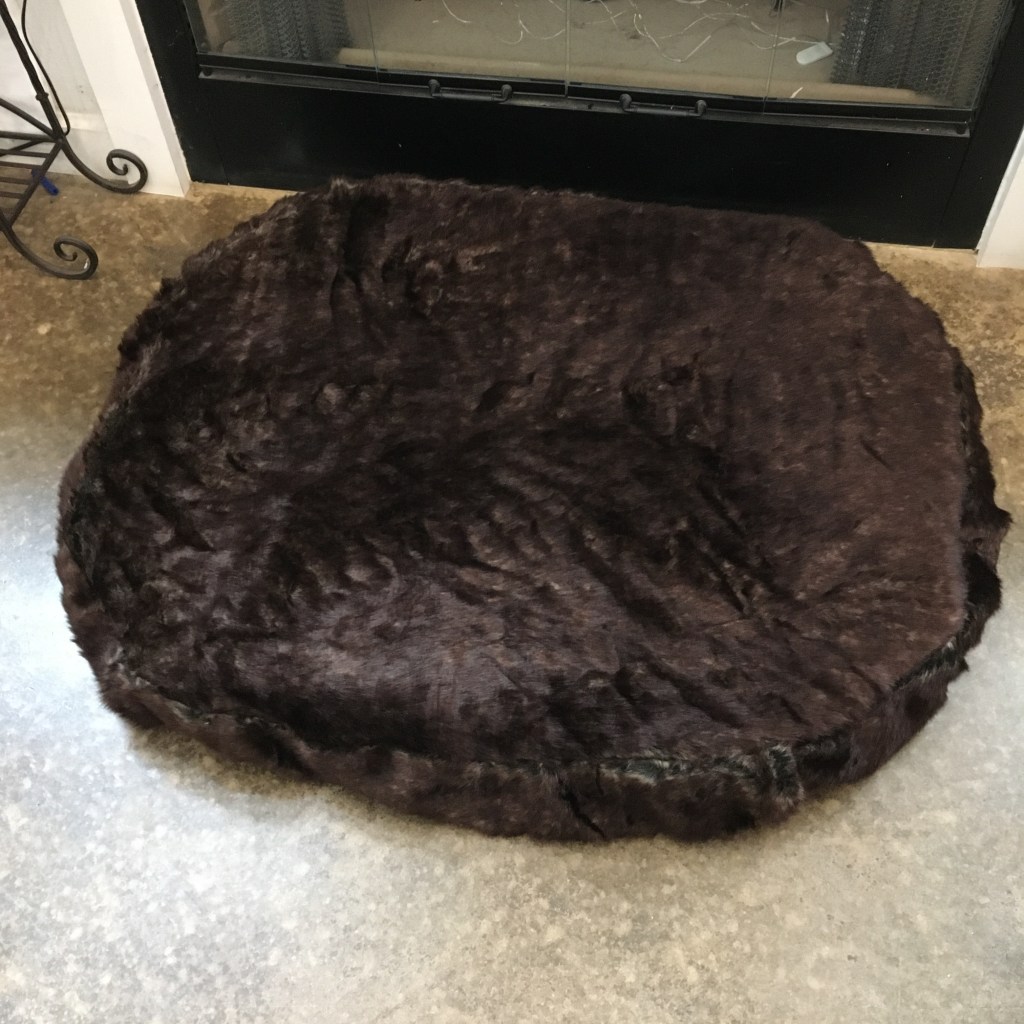
I measured for 1” seams, but ended up with an average 1/2” seam, so the fit of the cover is loose. The fur is forgiving, though, so I think it still looks good. Not neat and crisp, but homey and comfy, which fits our style. And I spent less overall than the high end beds at the store. Phew!

He likes the bed, but doesn’t understand why I am taking a picture

Embrace differences

Uh oh, the outdoor vinyl cutouts are very addicting. I made the castle for my husband’s truck, the dragonfly for my vehicle, and then the other corner of my window needed updating too. I just happened to have some white premium vinyl that I used on the kid’s water bottles. That stuff has stuck on fast even with weekly trips through the dishwasher. But what to advertise to everyone sitting behind me at traffic lights? I wanted some variation on the theme that it is good that everyone is different; it would be a terrible if we were all the same. But that is a lot of text to squeeze onto a sticker. So I used two words: Embrace differences.

Embrace Differences vinyl cutout

I created the graphic in Adobe Illustrator and used my Cricut cutter to cut the vinyl. I like the negative space “Embrace”. I also put this out on my Redbubble shop as a t-shirt design in white and black. The solid color prints come out nicely, with a bit of variation from the knit material, which I like. Below is a different design I had printed on a brown shirt.

T-shirt graphic by me, printed by Redbubble

Washing alpaca fleece

So excited! I’m getting into the alpaca fleece that I bought from a local alpaca farm over a month ago. I followed the instructions in Mary Egbert’s book “The Art of Washing Wool, Mohair, & Alpaca” and washed an armful of each color.

Raw fleece (from Aimee the alpaca) above, wash bin on right, rinse bin on left, drying towel behind, cat photo bomb

I used a capful of Amway LOC soap in the wash bowl, and let the fibers soak for a few minutes. Since alpaca fiber doesn’t have lanolin I didn’t have to be as diligent with keeping the temperature consistently hot. I used hot water from the tap for both the wash and the rinse. I gently squeezed out the soapy water before putting the fiber in the rinse bowl, let it sit, then gently squeezed out the rinse water and rolled the fiber in a towel to remove most of the water.

Sugar Plum’s fleece raw center, wash right, rinse left

The alpaca fleeces seemed relatively clean to start, but as you can see in the picture of Sugar Plum’s fleece above, there was still a fair amount of dirt in there! Which is to be expected, since alpacas like rolling in dirt.

Raw fleece above, washed fleece below

I bought a dark brown (Aimee’s), a fawn (Donnabella’s), and a cream (Sugar Plum’s) blanket fleece. The most dramatic difference was in Sugar Plum’s fleece wash. The cleaned fleece was nearly as white as my towel!

New drying rack with freshly washed alpaca fleece

I installed a new drying rack in the bathroom over the tub. This pop out hanging tray system can have six layers! Lots of space for drying fiber! After washing and rinsing, I put all my fiber here to dry. Carding comes next!

Rainbow cloche

I crocheted up the rainbow yarn! Rinsing the single ply on the niddy noddy worked great to set the yarn. At just over 50 grams, there was not enough to make an adult sized hat, so… I spiral striped it with black. It came out well!

Crocheted rainbow cloche style hat

Even though my spinning still has thick and thin places, the crochet looks nice. I did remove some of the thinnest spots, especially along the edge.

Commercial spun yarn on left, my spindle spun on right

Though honestly, the practice is helping. I found a left-over bit of merino wool I had purchased years ago, and the yarn I made is comparable. Neat.

Rip repair

Repair weaving done inside pants

I tried a new method of rip repair on my eldest’s pants. It always seems to be the back pocket the pulls apart at the corner. Probably because this is where she puts her phone! I’ve tried a whip stitch, which looks bad and pulls apart, a mattress stitch, which also pulls apart, and reweaving which is effective but visible. I had the idea this time to use the weaving method, but only pick up fabric threads from the wrong side of the fabric. So I sewed back and forth across the rip rather than along the rip. The hope is that I caught enough fabric to support the thread, and the thread will hold the rip closed.

Repair barely visible from right side of the fabric

The idea came from browsing all the beautiful embellished repairs on Pinterest. However, my eldest likes subtle, so didn’t want me to use rainbow thread on the outside! I can report that at the end of the day, the stitching still held. Hurray!